Every now and again I get surprised by the amount of effort it sometimes takes with the smallest of tasks. In this case we are talking about a woodworking project, but that concept can just as easily be applied to any smaller project or effort that requires more focused attention and skill than expected in order to reach a happy conclusion. For my story, size definitely does not matter when it comes to time spent or headaches incurred on a project. Advil anyone?
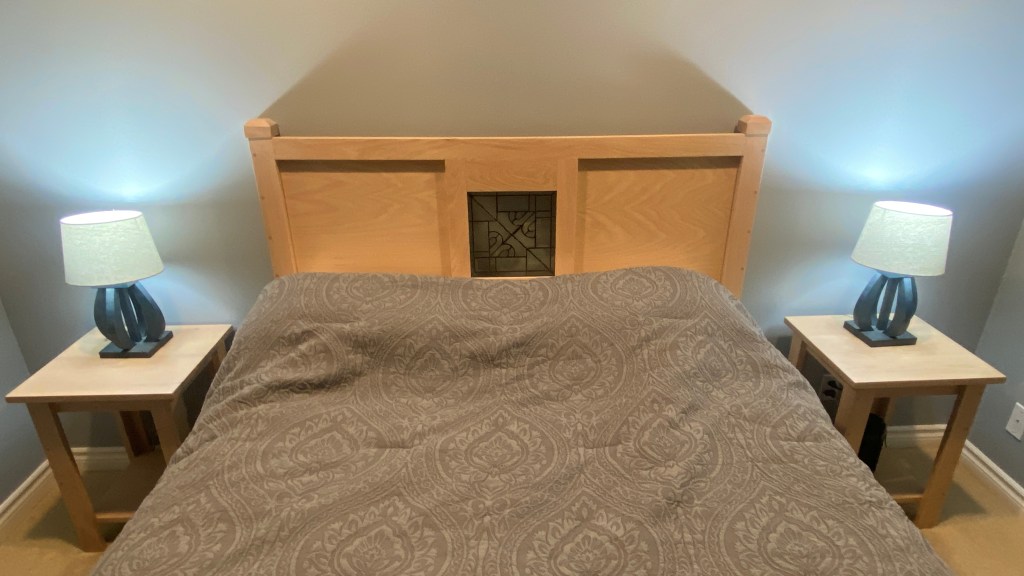
If I think back to one of my largest woodworking projects, specifically a queen sized headboard and two side tables for our spare bedroom, that was a simple build. Those design steps and build activities involved a series of straight and simple cuts on the tablesaw, some gluing and clamping and some wipe on stain in order to call it a day. It looks impressive because it is huge and makes for a statement piece and focal point in the bedroom, but it wasn’t hard to build.
By comparison I’ve experienced this unforeseen labor problem before, especially when working on something completely crazy like my four path marble machine. However, that was unique because I already knew the design would be difficult to build. It would be true to say that I expected some extra time to figure out those technical or design perspectives I didn’t yet understand. It is also true to say that I never expected to spend that much time making all the pieces and parts of the machine actually work harmoniously together.

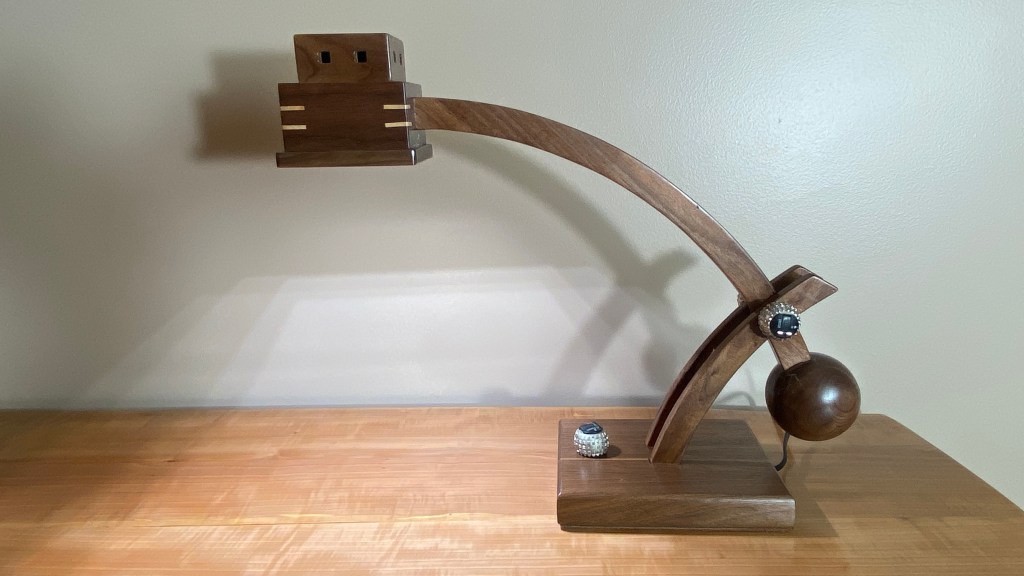
Today’s blog topic centers around an object weighing less than 4 pounds, 21 inches long and only 7 inches wide so yes, it’s rather small. Since you’re also still trying to figure out the connection to title of this blog I should probably reveal that we are referencing this week’s project; a desk lamp. Yes, apologies to those of you expecting a Bible reference or a story of spiritual enlightenment. I just needed some more light on my desktop.
It all seemed to be simple enough. For a visual backdrop, picture Steve Martin shuffling down a city street in the movie “The Jerk” with his pajamas down around his ankles, carrying a few small objects in his hands saying; “this piece of wood and this light bulb and some glue are ALL I NEED”.
No. Sorry, (Northern Minnesota apology). “It’s all about the design, stupid”, or so I told myself after the fact. The artistic ideas I had for this lamp involved, by no surprise, a few challenging woodworking things I had never tried before. I should have known then that the hours and fried brain cells required to complete this project would be greater than expected.
The Pain was Already But Unknowingly Baked into the Plan
Style wise, I was looking to stick with the mission / craftsman furniture period from the early 1900’s. I chose this period because it fits with other furniture pieces I’ve made but it would also compliment a Frank Lloyd Wright inspired office clock I designed a couple months before. I wanted the lamp arms to be articulating so that you could adjust the light lower to the desktop, or higher up to wash over a larger area. I also wanted to avoid straight cut wooden pieces because I thought a curved lamp frame would look a little more complex and bespoke. A three layered square birthday cake design was drawn up on paper for the lamp head, looking a bit like an art deco pyramid, and I thought I might need a counter weight for the short end of the lamp’s boom arm. “Wouldn’t it look cool”, I thought to myself, “if the counter weight was a perfect wooden ball?” Oh, and I should probably use some sort of low profile LED light system inside the lamp head so that the head wouldn’t have to be too massive, supporting a traditional socket and light bulb setup. Yes, yes, yes. A brilliant sounding set of design criteria. Where’s the tequila?
Problems started right away when I decided to make the round ball counter weight first, prescribed to be a perfect 3 ½ inches in diameter. I hadn’t mentioned up to this point but I chose to use Black Walnut for the lamp which should have been easy enough to cut on the wood lathe. If you’re not a woodworker, turning a square piece of lumber into something round isn’t that difficult. Leg spindles or bowls or vases are manageable because you’re only spinning the wood on one fixed axis. Two points on that block of wood are always anchored on both ends of the lathe. Making a ball? The difficulty is hard to put into words. You immediately lose your two fixed anchor points because you have to constantly rotate the wood onto a different axis so you can round out the other high points on the sphere. In any case, this was one of my first attempts at turning a ball. It took all day to get it looking more like a baseball than an egg. I curse. I continue. I learn. I finally get a good looking Walnut sphere.
Working with curved wooden pieces is something a woodworker gets used to over time and you can get good at drawing up a perfect radius depending on your project needs. The curved lamp boom arms weren’t the problem, in fact they measured out, drew up, cut and sanded very nicely. Yay, me. In my infinite wisdom however, I wanted to hide the electrical cord on the lamp. In order to do that I needed to find a way to bury the cord inside that curved piece of wood I had just cut. That would mean cutting the boom arm perfectly in half, hollowing out the inside and then gluing it all back together with a cord inside. No problem. How do you safely cut a curved piece of wood in half at the table saw, huh? It’s easier to watch the video to see how I eventually did it. Oh, and the hollowing out process on the curved pieces? That was nightmare fuel instigated by a half-moon cutting bit on the router table.
LED light sources were the next problem because none of the commercially available socket and bulb solutions would fit inside my lamp head design. I needed something small and bright but also flat. So I took a small LED spotlight like the ones you screw into a ceiling socket and hit it with a hammer. Don’t do this at home. I’m a professional and I know what I’m doing. 😉 😮
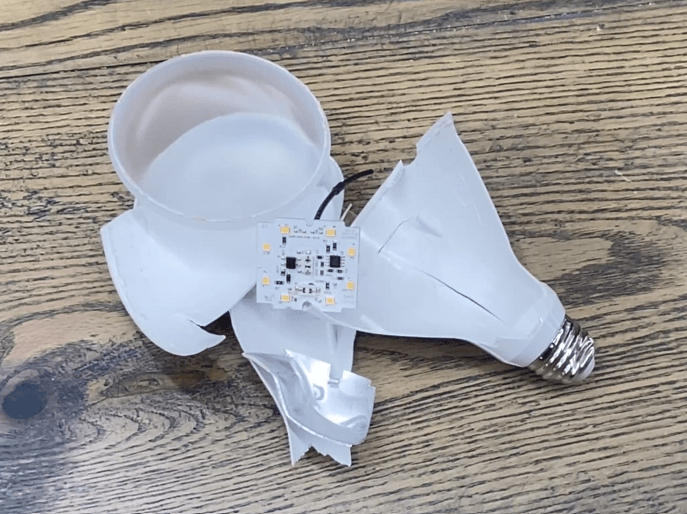
I knew enough about basic wiring to take that thin little LED plate and get it mounted to another piece of flat aluminum. The wiring was difficult to achieve inside my lamp head design but I did finally get it to work and it eventually fit well inside the head, hidden from view. No big ugly bulb sticks out from the lamp head.
The last challenge was trying to figure out how to attach the two lamp frame arms together, so that the longer upper arm could bend up and down but still lock into place when it was at a preferred angle. In the end this was accomplished by running a through bolt across the frame arms at the right bend point, and secured by compression nuts on both sides. Find your preferred lamp head height and tighten the nuts to hold the arm pieces together; done! But, since regular old steel nuts and bolts look pretty well, regular and old, I thought I might dress those up with something even older but way cooler.
Remember those old IBM Selectric typewriters? I guess you might have to be older than 50 to have ever seen or used one, but they were the business standard before computers were a common thing. As my old company was tossing a bunch of these typewriters away one day, I rescued a few of those aluminum type ball heads from the machines. With the locking nuts glued into those typing ball heads, they made for a pretty cool retro solution to lock up the lamp angle. Oh, and one more typewriter ball to cover a rotating switch on the front of the lamp base too. It looks pretty awesome.

The rest of the project put me into autopilot mode with sanding and spray finishing and final assembly. Now that the difficult parts of the build and all the design challenges were over, it was nice to get to a finished wood shop outcome. Still, even after all that work and early testing to make sure the electrical connections wouldn’t start a fire, there is always that touch of apprehension when you turn that switch for the first time. Would there be light? Please, let there be light. And… no sparks.
Yes, there was light.
A project like this seems so simple but yet wasn’t. I should have known. Now I do. Small sized projects don’t always mean simple or easy. Live and learn. Better yet, live and learn at my office desk that is now brightly lit by a pretty cool looking desk lamp.
Cheers to you all.
mm